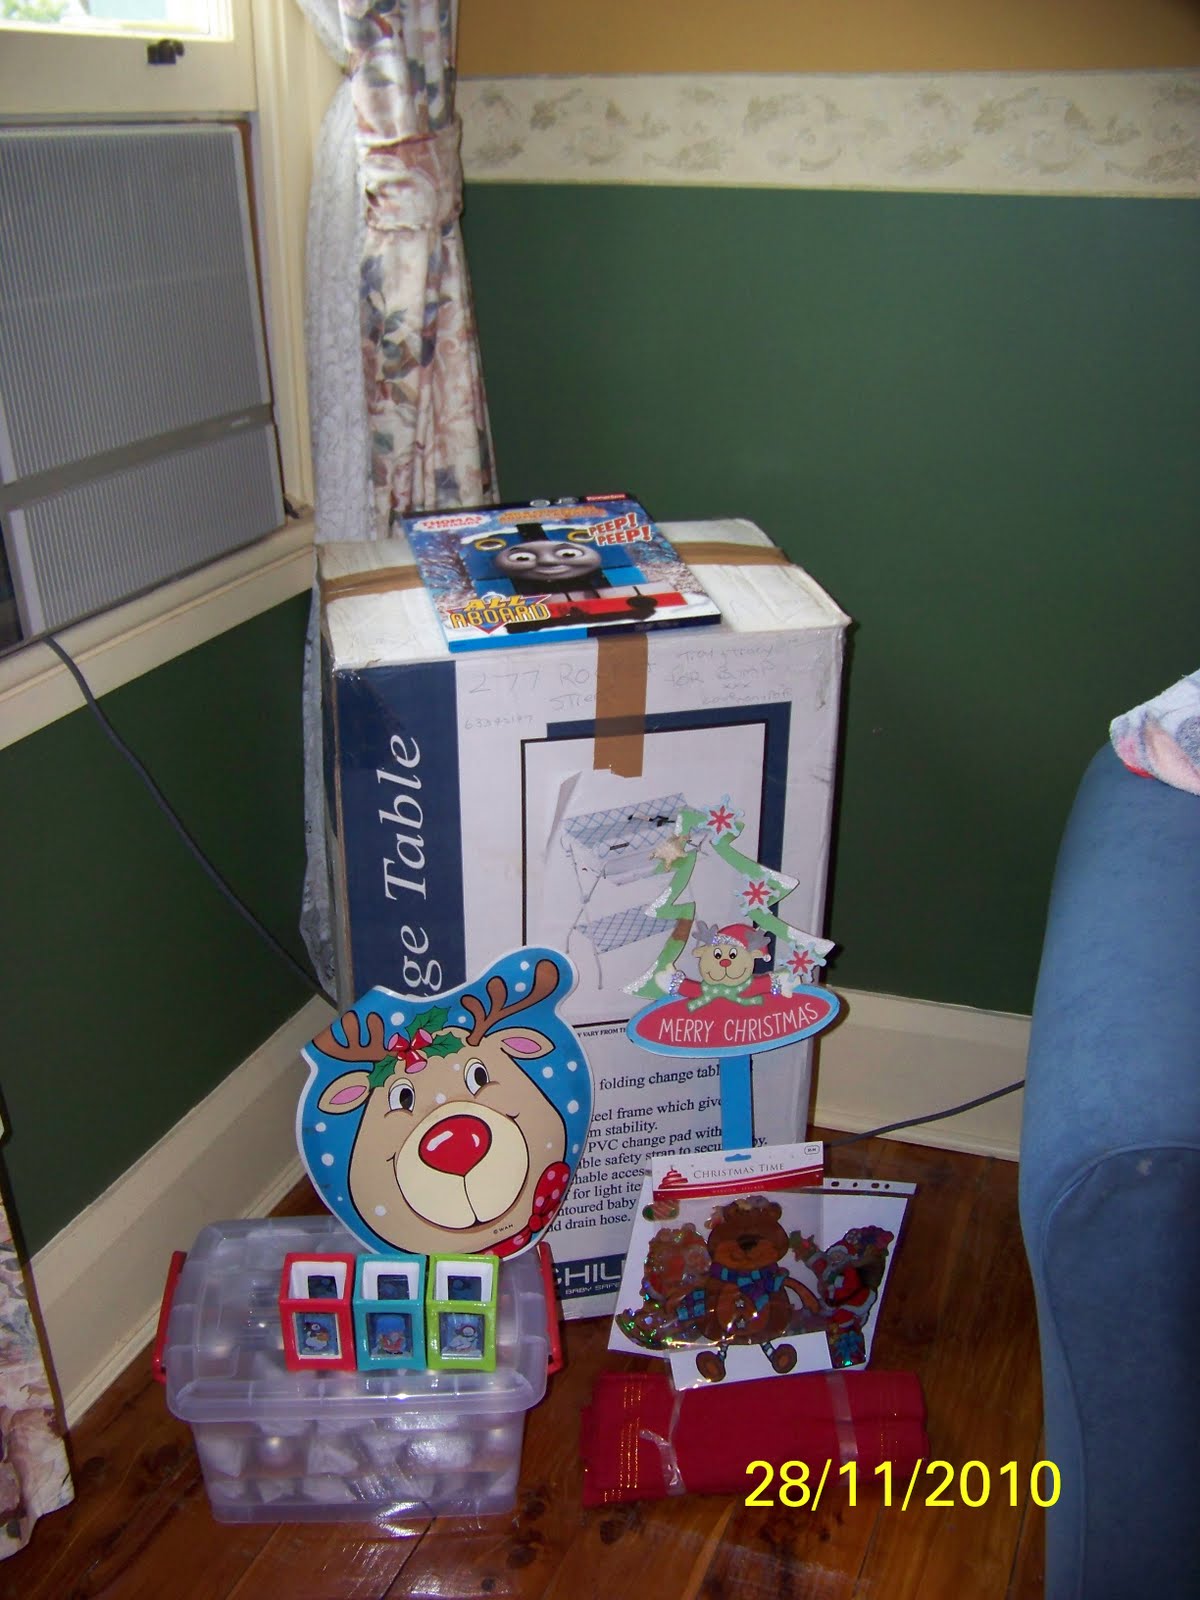
My closest friends


It has been a tradition with one of my closest friends that we send one another a small gift for Christmas. Usually encompassing a magnet of some sort. This year I couldnt find one that said what I want it to, so I took my trusty camera outside and went looking for a nice shot. I took a few but only one really suited my purpose.

I have two very close friends, however they are close relationship and thoughts wise moreso than distance. Both are at opposite points of the country to me really. Oh well. With that in mind I thought it quite apt that for this years magnet present it be not only sent to my original friend but also to my other close friend so that she too knew what I was thinking and feeling...


I have no doubt that they will both like them.

Taggy Cube (with rattle)


What you'll need:

Tailor's chalk or pencil
Scissors
Pinking Shears
12 x Ribbon
6 x fabric (prewashed and ironed)
Pins (preferably with pearled/beaded end)
Ruler
Set Square
25mm Bell
hobby fill
needle & thread

Optional - Rotary cutter and mat (not pictured)

Using prewashed and ironed fabric cut 6 squares 5" x 5". This is quickly and easily done using a rotary cutter however a pair of sharp scissors will do the job as well. Use the set square to make sure that your squares are exactly that, square!

Then from the ribbon cut 4" lengths. You can use the same ribbon more that once, if that is your personal preference. The aim is to have a variety of colours and textures for baby to play with. You don't want them to be too long though as then baby's fingers may get entangled.

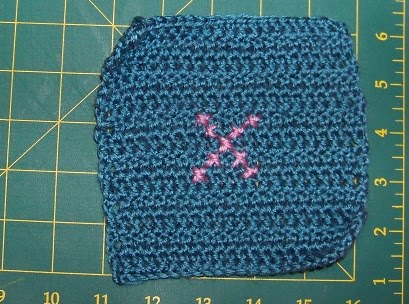
On the back of each square mark another square approximately 3/4" inside. This is the line that you will be sewing on. A slightly larger seam allowance due to it being a child's toy, an extra insurance against fraying edges.

If you like you can layout your blocks to see the desired end pattern. (Obviously I didn't take my own ironing advice). You may also like to lay down the individual ribbons, one on each side seam, to decide where each will go, or, you can fly by the seat of your pants and make it up as you go!

Fold in half a length of ribbon, wrong sides together, pin this in the center of the edge to be sewn, lining up the raw edge of the ribbon to the raw edge of the fabric. With right sides together, pin two squares aligning corners and lines.

So that when the fabric is turned to face right side up, it has a small ribbon poking out.

When sewing, reinforce the beginning and ending of the row, also back stitching over the ribbon for strength. Make sure that you begin and end where the sides intersect.


Continue going in the same way until all sides are together to form a cross. Then pin together the sides, right side together still. Continue until all sides are together, forming a box. On the final side sew until the ribbon and stop, leaving an opening for filling.

Once all edges are sewn, use the pinking shears on the exposed edges. Turn in right way.

Once turned, half fill the cube, then add the little bell. Depending on the size of the opening you may need an extra pair of hands to squeeze it through. The continue to fill until desired firmness is reached. Ensuring bell remains in centre.

Voila! One taggy cube with rattle! Fun and easy to make!

Please note that toy should be used with adult supervision.

Just hanging about


It's not very often that I get out and about for the sole purpose of taking some photos of my little one. However, just the other day, I finally got to take some. I was aiming for a nice shot of the two of us, but I just looked fat and frumpy. Not the look I was after. I did however get a few nice shots of little one on his own.

This is just one of the photos I took. Obviously I have played around with the original shot, just because I can. I used the free program GIMP to manupulate the photos.

The original photo, cropped to size

Changed to black and white.

That old style feel, my favourite of the three.

Little one was very cooperative and even wanted to climb back into the tree once we were finished lol! It was a lot of fun and it was great to see him enjoy doing a very much boy past time. Although I dont think I will be very happy when he starts climbing trees without mummy around lol!

Christening Card


After finally coming to the decision to allow my son to attend his estranged cousins christening, it posed the new question of gifting. The actual gift was not really a problem. I managed to find a very lovely children's bible from the online bookstore The Book Depository. I love their store, very competitive prices with no charge for freight. Granted I'm still waiting a week on for my book, but I'm in no rush, the Christening is not until January 2011.

Of course, with every gift is the card. Previous to this, I have been to a few other christenings and the cards for such occasions are very limited in stores and just don't seem to encompass the middle ground. They are either very child/novelty or religious, there is no even middle. So this time, I made our own.

The inspiration for this card was a little from Sarah Klass, Jak Heath and Lotus Art Studio. All found from google images.

The base of the card is a simple mottled cream card stock. The cross sits up on its background and then the background stands out from the card. Along with the written section. Overall, it turned out better than expected, especially with a toddler being carried back to bed every five minutes!!

Rocking Horse


This is my very first attempt at Filet Crochet. I've never followed a chart in regards to crochet or knitting for that matter ever before. Overall the finish isn't too bad, keeping in mind that I had no idea what yarn to use nor what needles etc, so I just fudged it.

The pattern that I used was by Sandi Marshall, a free chart hosted by About.com. Her result was very square, whereas mine is slightly more rectangular. Either way it wasn't a bad result at all!


It took about three days, on and off again. The above is the unblocked result. It took an hour to block it all out as I only had so many pins and a smaller ironing board lol!

I used Baby Bella Evelyn yarn with a slightly bigger hook then they recommended. I did that because I had full intention of adding granny squares and the like to make a boarder for it, which were all done with the same tension. However once I put them next to it, it will turn out to be too bulky and heavy looking, so I'm going to just make a lace border until I achieve the size I want.


All blocked out

It does currently have its ends hanging out in places. Ill sew them in when I do the finishing edges. I found the yarn to be extremely frustrating (possibly why it only cost $1 for a 50gm ball). Each ball that I have used has had knots (yes knots!) joining the ends of the yarn together. Resulting in the loss of at least a few inches of yarn while I cut out the knot and then reattach during stitching. I'm not sure if it is a sign of the quality of the yarn, where it is manufactured or both? I know I have never come across this, especially to this degree, before though.

Sewing Jinx & Healing Hearts


Healing Hearts is a campaign running at the moment for quilters to put blocks together to send to New Zealand for the 29 families that tragically lost their loved ones in the mine disaster there.

I only found this earlier in the week from a fellow blogging friend. Ive got my blocks in the mail today and saw they have enough blocks now.

Such a great cause, I hope that Shirley is able to pool enough resources together to finish.

In other news, I am jinxed with sewing machines! I borrowed mums to put my blocks together and now her machine makes a funny noise... or it did, then it went clang and viola no more noise... probably not a healthy sign though. I think I shall step away from the machines for a while lol.

The Lavender Bag


This is a design from The Art of Crochet series. It is a lavender bag, the sort that you put in your underwear drawers.

Its a pretty basic pattern of trebles made into clusters with double crochets in between. The thing I loved about this pattern, was the yarn! Its a Milford soft yarn and it just crocheted into a lovely random colouring. i had originally bought it to make some doilies with but never got that far. I'm glad I didn't now.

The first step was to crochet until it was 30 cms long. The end result was a bit misshapen...


I suppose that is why as part of the instructions it tells you to block it out before sewing the seams! haha! So naturally being the follower that I am, I proceeded to block it.


It took quite a number of pins to put it all in place, then I used a damp white face washer and gave it a gentle press. Viola, it was all pretty and square... well rectangular.

There was nothing left but to sew up the sides, crochet a lovely and simple shell boarder around the top edges and then thread a ribbon through. The actual pattern calls to make and insert a lavender sachet and then simply tie a ribbon around to hold it in place.

Well I have allergies so I'm not going to use it for a lavender bad at all, rather a pretty little gift bag at some stage... maybe even for something much better than lavender... like, I don't know... Chocolate!

Its beginning to look a lot like Christmas!


I gave in to the Christmas spirit and pulled out all our Christmas decorations this morning. I still refuse to write on any Christmas card until at least December 1st but I figured it was either this weekend or next to do the tree as our mid week is usually pre-occupied. It amounted to a few boxes and random items...


So off to work we set... My little one was more keen on playing with his farm animals then helping, however once the tree was up and I found the baubles "bubbles mummy!" he showed slightly more interest. Last year we had a silver and blue theme with a splash, dash and drop of other random colours, so this year we stuck to the same theme. This year, however, the glass baubles (beautiful as they may be) stayed in their plastic container for another year. Good thing too, as we dropped a number of them in decorating, the best part about the plastic ones is that dropping them on solid wood floors = bounce! Not smash!

As usual the first thing to go on the tree was the lights... bah... a tangle of wire and coloured lights. Note to self - next time be more careful in pulling of and packing away so as not to spend half the morning untangling them!

Bah humbug!

The last thing to go onto our tree is our special ornaments. There is one for each christmas that we have had together as a family. (Well two for the first one as it was pretty special). My favourite is the bottle with the tree in it... I still have to buy this years, but there is plenty of time to do that.

Im terrifed of a little someone grabbing them off, but at the same time, they need to be on there. Its just so!


We always have a card string along the hearth. I use tinsel to cover the blue tak holding it up. I pulled out the tinsel and little one immediately exclaimed "Catapillar!" He had a blast playing with that one piece of tinsel! It doesnt go with the blue theme of the tree, but purple is my favourite colour, so who cares!


You'll notice the empty stocking over the heater, my idea this year is to get little one to place all his dummies into the stocking before bed Christmas Eve as a gift to Santa. In exchange Santa will bring him something special, just for him. It's my hope that he will be able to understand this concept and make giving up his dummies a little more easy on the both of us. Ive been wanting to get rid of them for ages, and this seems like the perfect opportunity... I hope he doesnt hate Santa for life for taking them though lol!

The final touch in our Christmas make over is the front door. What door isnt complete without a Christmas Wreath?


...Merry Christmas...


I won - Bink Link


Well just like I dont normally post about giveaways to earn entries into competitions on blogs, I usually dont post about wins either. Mostly because I don't win!!

Well all that has changed, all thanks to Hip Little One and Mini Hippo.

This is what I won:

Photo from Mini Hippo Website.

Its a Bink Link, this one is the Gumball design. I had one similar to this for my own son when he was a baby. It worked a treat, right up until the day he learnt how to undo the clip lol. I got it from a local baby store that unfortunately stopped selling similar to the above and then shut down shop as she was having her own children. So now, all I need to do is find another baby to use this little treasure on ;-)

Happy Days!

Ho...Ho...Ho...


So it's fast approaching to be that time of year once again. The Christmas tree is in its box, the ornaments in another. I have however made our christmas cards. I love making them and this year was so much better than last.

Last year they were simple photo cards, shoved into envelopes and sent off. This year I used my digital scrapbooking program for the front image. It's my gorgeous boy playing outside, one of my favourite shots of him.

Inside I made simple christmas trees and used pre-printed stickers for the 'message'.

Now to find out how many I actually need (I suspect a lot less than usual given I'm no longer on forums) and to personalise them with a message, ready to be sent no earlier than December 1. And, yes, I have already gotten two Christmas Cards... It's still only NOVEMBER! Bah humbug! lol.

The Sewing Machine must die!


So these are our Imse Vimse swim nappies. The one of the left is our newest addition. This is the way they should look. The one of the right is our old swim nappy, after 18 months (give or take) of solid use every week, I finally retired her. Not because she no longer worked, but simply because she was old and worn.

Because she still works I decided I would use her again... ELMO style...


I cut her down the sides so I could get the shape, I added new elastic across her back, front and legs (just to be sure) and pinned her altogether...

It was then that my sewing machine snapped my needle, ate my thread and just generally was not agreeable. It does this often, I thought finally the gremlin had left when I had thirty minutes of solid sewing without missing a thread or catching. Apparently not...

So until she gets a service (and probably a fix) no more sewing in this house! Phooey!

Hip Little One - Giveaway


Well I dont usually blog about giveaways, however Hip Little One has a gorgeous giveaway that I am dying to win. In order to get as many entries as I can, I am now blogging about them lol.

Their giveaway is for a Playsand 'Im Bored' kit. Playsand's such a great idea and I can see my little boy having lots of messy fun with it! Heck I might even enjoy it too seeing as it is right up my creative alley.

Be sure to check it out :).

Apple Crumble Delight


This is a variation of two different, 4 ingredient, recipes. Although I have never tried the proper 4 ingredient recipe I must say, that my version ROCKS! It also contains no apples from a can =P

So yummy.

INGREDIENTS:
  • 8 Granny Smith Apples (approximately 800 grams), peeled, cored and sliced
  • Sugar to taste
  • 250 grams Scotch Finger biscuits, crushed
  • Small handful of chopped/quick oats
  • 75 grams of softened butter
METHOD:

Preheat oven to 180 degrees.

On a medium heat add chopped apples to saucepan, add Castor sugar to taste and cook through. Do not allow to boil. Once apples are cooked take off heat and place into oven proof dish. Layer evenly.

Using a mixer, beat the butter with sugar to taste (not much is needed given the biscuits to be used) until light and fluffy. Add crushed biscuits and oats, mix until combined. (Note this will not form a solid mass but be crumbly in texture). You may wish to add Cinnamon to the mix at this point.

Take the biscuit mix and cover the apples.

Place in oven and cook for 15 minutes or until golden brown.

Variations can include lemon juice, saltanas and cinnamon.

Enjoy!!

30th Birthday Cake


No I didn't make the cake, that was done by a very talented friend of a friend. I did however take the photos, and then play with them a bit.


The Scrapbook


I've never been one to do digital scrapbooking. I mostly put pen to paper and scissors with glue, cross my fingers and be pleasently surprised at the end.

I tried once or twice on a very basic $14 digital scrapbooking program to see if I would like it. I did, however, due to the programs capabilities... or rather inabilities... I was unable to do anything with my created projects. They just sat there, unable to be looked at by anyone without the same program, unable to be exported for printing, what was the point?

At this stage I decided to look around for something that could do all that and more. I looked at the Creative Memories Storybook program and its lovely price put me off. That combined with the fact that I would still need to use my trusty GIMP program if I wanted to manipulate my photos. Not really an issue as GIMP is free, but still, if Im paying that price I want all the bells and whistles to boot.

I went to our local Hardly Normals (Harvey Norman) and had a look at their range. It was a decision between Serif Digital Scrapbook Artist and something not Serif Digital Scrapbook for slightly less. However SDS did everything I wanted it to do and more. It did everything Creative Memories did, plus some. I was sold.

I got it home and started right away, I couldnt help myself. I couldnt stop. Hours upon hours creating my sons story book. The story of his life, from conception to birth and beyond...

Then the unthinkable happened... my hard drive died...

I have a copy of the pages on a facebook album. Im praying that a copy of them is on my thumb drive, along with all the hundreds of embellishments that made up those twenty plus pages so that I can continue where I left off. I had a dreaded feeling that they arent. That I will have to start again. I cant bear to look on my drive to find out...

An example of one of the pages

The Weed


Block Five


Once again this was a very simple and quick block to produce. Again, Im not very keen on the back of the block where the cross stitch comes through, however I guess I will have to learn to deal with it as there is no changing it now.

I havent looked at the next block yet, but I cant wait, whatever it is. I cant believe how quick it is to crochet compared to knitting! I wish I had started sooner!!

Block Four


The granny square!! Oh how I longed for this simple block. And yet, when it came time to produce it, I hated it. I had never done a block that required anything except simple crochet, this incorporated doubles and trebles and was a lot more difficult than it needed to be. It did however produce a much better finish than my other ones (but shh!).

Block Three


I loved making this square. It was so simple to crochet and took little to no time at all. Im not very happy with the back of the square, its neat enough (years of practice, although dislike, of cross stitch) I just dont like the fact that when the quilt is finished, if you turn it over you will see pink lines etc. I would have liked to hide the stitches within the white as I went but it proved difficult to achieve the look while maintaining even cross stitches.

Block Two


My second block from 'The Art of Crochet' is the shell block. Overall it turned out square which is the main thing I suppose. Im not very happy with its overall look. I may undo it and try again later. Im not entirely sure what it is about it that I dont like. I had trouble understanding exactly what they wanted me to do at each of the edges and just seemed to fudge it as I went, perhaps that is what is wrong? Otherwise its a rather pretty square really.

Block One


A few weeks ago now I saw an advertisement on Television for a magazine called 'The Art of Crochet'. I've always been a reasonable knitter but apart from granny squares, never able to crochet. It was with the first issue of this magazine that I finally relised that my cute little animal book where Wesley and Scooter Pup hail from, was actually in American Crochet, hence why it made no sense to me. I wasn't as silly as I thought!

The first block I completed from the series.

It turned out rather square for my first attempt at a quilting block anything other than a granny square.

Basket Weave Jumper


A few weeks ago I went to spotlight to get some wool. I didnt end up buying wool, but I did buy a couple of kits (that had the wool included) to try.

The first one, turned out really well. I haven't been really into knitting lately, but this took no time at all. Its a very simple pattern with no shaping. I did make the button holes a little smaller so I could use my cute little baby blue ducks that I got from Ebay.

It was my first attempt at using a matress stitch to sew it together. I wish I had've been told about that stitch years ago!!

Erica


Yesterday I finished my very first library bag. I made it from scratch without the aid of an official pattern and fudged it as I went.

The result was rather impressive even if I do say so myself. I am not 100% happy with the draw string straps and may change them before I give it to the lucky little lady. Time will tell.

It was made for Miss Erica. A friend's daughter who is starting school next year. Im sure she will love it. It is made from a soft denium look fabric, with flower motif embrodiery. I couldnt have found a more lovely main fabric. I made my very first ever lined pocket which turned out perfectly first go!!

The Pocket detailing

The name was fused on before using blanket stitch over the edges for a more professional finish. The most difficult part of the name was trying to use the iron on the fusing while getting the rounded letters to fold underneath so as to avoid fraying without burning my fingers.

Detail of the lettering

They turned out rather well. Her name is perfectly centred across the top and the colours just blended better than I could have imagined.

Hanging by the straps.

The inner layer is a special fabric that I got from Green Beans Australia. Its called PUL - Poly Urethane Laminate. Its a water proof, breathable fabric that is used as a layer in modern cloth nappies to prevent outer clothing from getting wet. I orginally went to Spotlight to see if they had a readily accessible equilivilant, the sales attendant basically looked at me strangely and tried to sell me something that would not do what I wanted it to. So I promptly came home and shopped through the colours on GB. It was really pot luck as to if the colour would work of not. It came in the mail and it was fantastic! I musky pink which complemented all my other colour choices! Woo Hoo!. Making the lining work was a bit of a pain as I hadnt done a bag or lined one for that matter, for over ten years! TEN years!


Create-able Me Copyright © 2008 Green Scrapbook Diary Designed by SimplyWP | Made free by Scrapbooking Software | Bloggerized by Ipiet Notez